Framing Basement Bottom Plate Does It Have to Be Continuous
Framing your basement walls is the true first step in finishing a basement. Get ready, because this is when all of your time spent researching, planning, and designing your basement will finally pay off. You're like Rocky running the steps, pumping your fists, training so hard for your one chance at glory. Well that time is NOW! Do me a favor and turn down 'Eye of the Tiger' so you don't wake the family.
The first time I pulled out the measuring tape and started marking out studs was a great feeling, and I hope you'll feel the same way. If not, go ahead and turn 'Eye of the Tiger' back up. Heck, wake the neighbors it's time to get pumped!
Okay let's back it up, I just needed to get you psyched. Before jumping in with the pneumatic nailer you'll have to decide what framing method you'd like to go with. If you're here to learn about framing floating walls for your basement, click here to jump to the bottom where I get specific about my floating walls, a requirement when finishing your basement in Colorado.
After reading this post you may have questions, do yourself a favor and join my free Framing Forum. Say that three times fast.

As for framing your basement walls, there are two main methods that I've come across in my research:
Frame Your Basement – Methods
- Build the wall on the floor and lift it into place
- Build the wall "in-place"
It might seem like the "lift into place" method is the easiest and most logical. This is what I thought at first, but after the research it seems the better method is the "in-place method. It's better for a few reasons:
- With the "lift into place" method you're stuck building the wall 1/4-1/2″ shorter than it should be to allow for clearance when lifting. This means you have to use shims to make up for this lost space.
- The "in-place" method doesn't require shims, meaning you're left with a more stable wall (I do have a method that doesn't require extra clearance or shims, check out the "Build on Floor Method" below)
- If you're framing a basement on your own, the "in-place" method is far easier than the "lift into place" method
That being said, I had to take a different approach as I was required to build floating walls in my basement. As a result I had no choice and built my floating walls on the floor and lifted them in to place. If you're not required to frame floating walls, I would recommend the "in-place" method as it will save you time overall. ESPECIALLY if you're doing most of the work yourself, you'll save a few headaches.
Frame Your Basement – Getting Started
Just get in there. Measure out that first wall and just go for it. It took me at least a few weeks before I mustered up the courage to get started, but there was no need for a delay.
I chose to build my first wall in a simple spot with no windows, no soffits, and the shortest length wall in my basement. I recommend doing the same, just to make it easy on yourself and build your confidence when it comes to some of the trickier wall placements.
Get Lumber
For your first wall, do yourself a favor and run to Lowe's/Home Depot/Your Local Lumber Yard and get just enough lumber for your first wall. If you're like me and are planning on finishing your basement over weeknights and weekends, you don't want excess lumber laying around for a long time. See below for my biggest challenge (or doh! moment) with framing.
Once you've finished off the first wall measure out your basement and place an order for the lumber to be delivered to your house. A heck of a lot easier than making constant runs to pick it up yourself and you'll save yourself a ton of time. I'm not sure I saved a lot of money doing it this way, but I did save a lot of time, and to me saving my personal time is a lot like saving money.
Pressure-Treated Bottom Plate
I'm pretty sure this is required most everywhere, but not positive, so don't quote me on this one. However, I needed a pressure treated bottom plate (2X4 board) for all of my basement walls, and if code in your area requires the same than you're going to want some things:
1) Pressure-treated plate (duh!)
2) Concrete nail gun and powder loads
3) Nails for the nail gun (duh!)
4) Construction-strength adhesive
Noticed I said you're going to WANT these things. You'll need the pressure-treated plate and probably construction-strength adhesive, but you can get away without the concrete nail gun, it will just require a lot of time and effort on your end. I purchased a Ramset .22 Powder Actuated gun for about $90 from Home Depot and I can honestly say it was one of my favorite purchases of my entire basement finishing project.

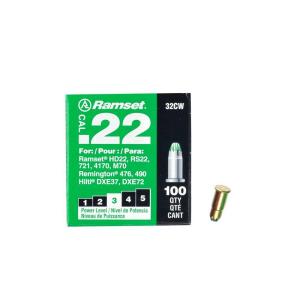
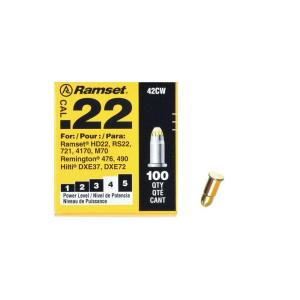 The only downside to the cheaper gun I purchased was that it couldn't handle a powerful load, meaning I had to purchase two different strengths of powder loads. In my research on this gun a lot of people said they had to take two shots to fully seat each nail in the pressure treated plate, one 4-power and one 3-power load. I found the exact same to be true, and ended up shooting each nail twice, starting with the yellow "4 Power" load and then finishing it off with the green "3 Power" load.
Something I would highly recommend is purchasing construction-strength adhesive and running thick beads underneath this pressure-treated plate before shooting your nails in. I found that if I didn't use the adhesive, the board would sometimes wiggle and not be completely secure after nailing. This seemed to be the result of the concrete breaking and cracking instead of allowing the nail to go in cleanly. Fix that problem with A LOT of construction adhesive. I recommend the Loctite Construction Adhesive from Home Depot. Pay an extra buck for the premium stuff, because IT'S WORTH IT!!
Measure, Cut, and Mark Studs
Alright your pressure treated plate is down. Congratulations, time for a beer and a 10-minute break. 10-minute break complete, let's tackle this wall.
You should have your length from the length of your pressure treated plate so cut two more plates the same length, a top and bottom plate for your first wall. At this point you're ready to mark out the wall for your studs, 16″ on center. If you want to try and get away with 24″ on center you can, and if you're not worried about any loss in the sturdiness of your wall you'll save a few bucks on lumber doing it. I chose to go 16″ on center with all my walls, a few exceptions being some shorter walls surrounding my mechanical room.
Start by clamping your top and bottom plate together, I used two of my trusty Irwin Quick Grip clamps on each end. At this point you're ready to mark out where your studs will be nailed. Here are the most common mistakes made when doing this:
- Not adjusting 3/4 of an inch for your first layout mark.
- Not following a continuous 16 inch (or 24 inch) layout.
- Not using framing square for layout.
- Not using straight plates.
- Placing studs on the wrong side of the layout mark.
At the beginning, measure 3/4″ in from inch the edge of the plates and make a mark. At this mark, I used a finishing nail and hammered it in to the side of one of the plates. I then hooked my tape measure on this nail, ran the tape measure down to the end of the plates, and then made marks every 16″ from the nail. It's important to note that this mark that you make every 16″ DOES NOT represent the center of your studs, it represents the outside edge. I would remember this by placing an X on the inside of the mark, or on the side that I hammered the finishing nail. This X will represent which side of the mark your stud will be nailed. When you've made all your marks, use a square of some kind to go down your plates and make a line down both plates at each mark, remembering to put your X on both plates as well.
At this point the next step depends on what framing method you're using to build your wall. If you're here to read about floating walls, scroll down and check out the "Floating Walls Method."
Building Wall In-Place Method
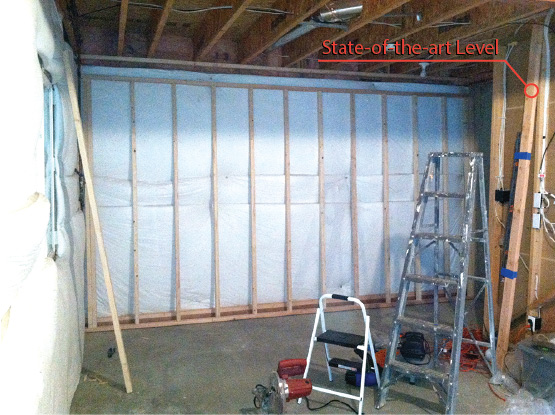
Time to get your top and bottom plates in place. Your pressure treated plate will act as your point of reference for translating a straight line up to your ceiling joists for nailing in your top plate. I used a State-of-the-Art Level you can see in the image above in order to do this. Basically you choose one of your straightest studs, cut it exactly to the height of your basement ceiling joists, and tape a larger level on one of the sides.
Now take the level you created and butt it up against the pressure treated plate. Climb a ladder and once the level is straight up and down, mark a line on your ceiling joist using your board as your guide. Do this a couple times along the length of the wall and you're ready to nail your top plate in!
Nail your bottom plate to the pressure treated plate and you are ready to measure and cut your studs. Then nail them in lined up with the X's you marked out earlier and you've got yourself a wall!
Build on Floor and Lift In-Place Method
Before measuring your studs and cutting, I recommend going along the entire wall and measuring from the pressure treated plate up to the ceiling joists. Do this in a few areas and take your smallest measurement, subtract 3″ for your top and bottom plate, then cut all of your studs to this length.
Layout your wall on the floor, line up your studs with the X's you marked out earlier and nail your studs in from the top and bottom of your plates. When you're done, lift up your wall and then set it up on your pressure-treated plate. By doing it this way you are avoiding having to place shims in between your top plate and the ceiling joists.
Floating Walls Method
I have a forum just for you, it's free and it's for people like you who are interested and have questions about framing floating walls. JOIN MY FLOATING FRAMING WALLS FORUM.
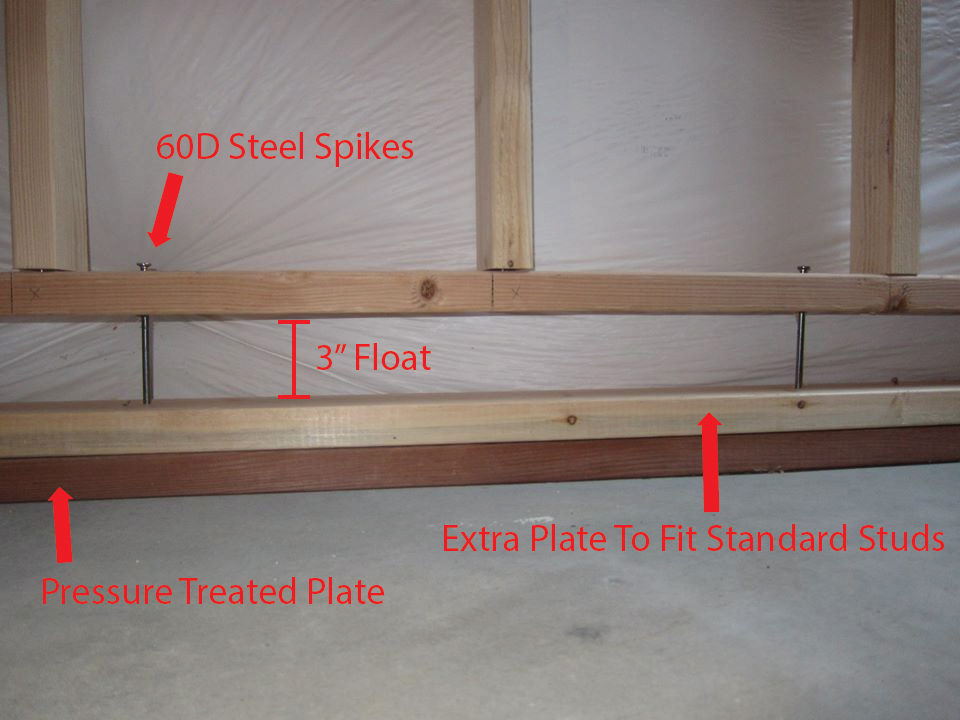
The grand-daddy of them all, floating basement walls. Because of expansive soil in Colorado, commonly called Bentonite, we are forced by code to build floating walls. Here's a good explanation of why the soil expands. The height or "gap" between your pressure-treated plate and your floating wall can vary by area, but in my area a 1 1/2″ "float" was required.
I have friends and colleagues who finished their basements and had to repair slight heaving in their basement slab because of the soil expanding. From our inspector I heard a story of landscaping done incorrectly and as a result the water drained under the house. This caused the soil to expand and ended up cracking a granite countertop in the kitchen and breaking pipes because it lifted the foundation that much. Thankfully the area I live wasn't subject to much expanding, but I know areas that are terrible and builders have gone bankrupt because the soil in some areas expanded so much and they had to spend millions of dollars redoing foundations the correct way.
Exciting stuff huh?!? If you're here because you live in Colorado and are looking for advice on floating walls, you've come to the right place. I was pretty upset when I learned I would have to build my basement walls this way, I had major concerns about strength and rigidity, but in hindsight it really wasn't that bad and ended up being kind of fun towards the end when I had the process down. The walls ended up extremely solid and practically immovable when done the right way.
You're probably looking at my picture and wondering what's going on there. I chose to use an extra plate on top of my pressure treated plate so that I could accommodate a standard 96″ sized stud without having to cut my studs. I consulted with my inspector first, but he said as long as the float gap wasn't larger than 3″ that would be fine. Even though it cost me a bit of money to add an extra plate, I figured the time I would save by not having to measure and cut every wall stud would be well worth it in the end, and it was!! If you're building floating walls I would highly recommend this method.
How To Build A Floating Wall
I'm assuming you've already completed two things:
- Pressure treated plate is nailed and glued down
- You've snapped a chalk line or marked lines up to your ceiling joists for your top plate
Time to start building your floating wall on the floor. Remember when you measure from your pressure treated plate to the ceiling joists, you'll have to subtract 3″ for the top and bottom plate of your wall, along with minimum 1 1/2″ for your floating gap. So that makes a minimum of 4 1/2″ total you'll have to subtract from this measurement to get the proper height of the studs for your floating wall.
If your ceiling is high enough, I highly recommend using my method of nailing an extra plate to either the top of your pressure treated plate or even one up on your ceiling joists to get your floating gap to 3″ or less with a standard sized stud in order to avoid having to measure and cut any of your studs.
Either way you'll want to cut your studs to the proper height, mark out your 16″ on center on the top and bottom plates, then nail your studs in. At this point here is what I did to be sure the floating wall was flush with the pressure treated plate while still remaining strong and rigid:
- Lift your wall and rest it on the pressure treated plate
- Use clamps or have someone help hold the wall up while you drill holes every 24″
- Drill your holes straight down the bottom plate into the pressure treated plate
- Lift your wall and nail to your ceiling joists
- Grab your steel spikes and hammer them in through the holes you pre-drilled
– These need to be touching so you can hold a square up against your pressure treated plate and bottom plate of your wall
– Use the square to ensure your bottom plate is flush with the pressure treated plate while drilling
– I accomplished this by myself by nailing another extra plate to my ceiling joists then using clamps to hold the wall up as I nailed it in
I chose a drill bit size that was exactly as wide as my steel spikes. I wouldn't recommend using a much bigger drill bit because then your wall can wobble a bit. I actually had to hammer hard to get them in and when I was done the wall was as solid as could be.
So there it is! Floating basement walls can seem daunting at first but by using this method you'll always ensure a floating wall that is flush, solid, and ready for the kids to abuse.
Warped Lumber – My Biggest Challenge
When I ordered lumber I was ecstatic. I had finished my first couple walls and I was ready to frame out everything else. I measured, calculated, and ordered everything I needed. Delivery, great. Quality, great. Moving lumber to basement, not great but fine. Leaving lumber in piles unused for weeks, NOT GREAT!
When the lumber came delivered it was packaged up nicely and held tightly by straps. Undoing those straps and transporting them to your basement means they are now subject to the climate changes in your basement. In a couple weeks when I was finally ready to start using this lumber, it was warped to the point they were completely unusable. Frantically I called the lumber company and they would not issue a refund because it had been a few weeks. NOT COOL!
A lot of money was wasted on that lumber, and although I may have firewood for the next three years I'm not down with that experience. In conclusion, don't order your lumber and transport it to your basement untied or laying in piles with the idea that you'll use it in a few weeks. When you order it, get your framing done ASAP, and if you need to leave your lumber unattended for a long period of time do your best to stack it neatly in larger piles and even strap it together if you can.
 Best of luck on framing your basement walls and please feel free to comment on your framing experiences or questions below!
Godspeed,
Tony
Share This
Source: https://www.howtofinishmybasement.com/frame-basement-walls/